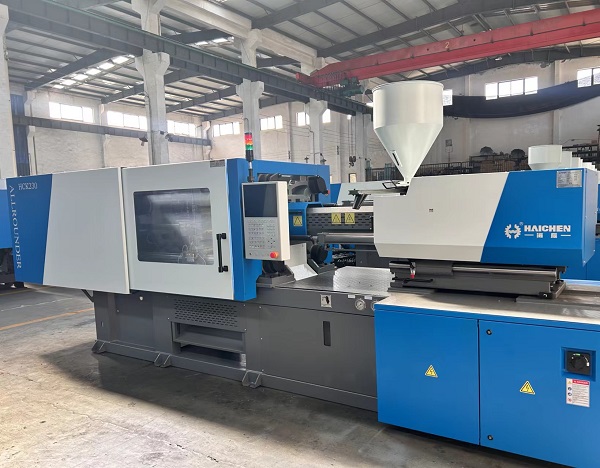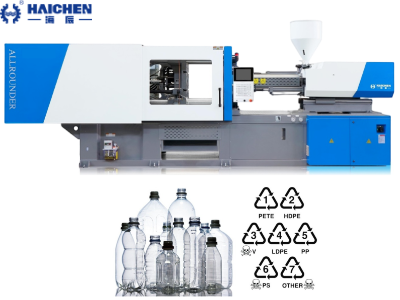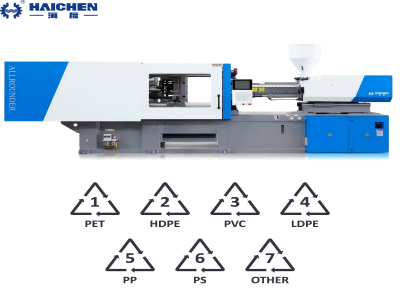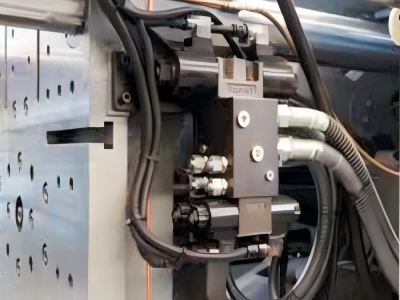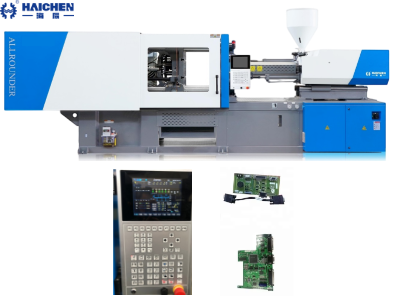
Injection molding machine operation process includes prepare raw material, plasticization, injection, holding and cooling and so on.
The steps in injection molding machine take raw material, plasticization, inject, hold, cool, etc. The basic working steps. The procedure for operating the injection molding machine is completely automated, which the injection molding machine works, follows the set technological sequence, and works under strict automation.
It requires the supervision and control of various critical factors. For instance, it requires control of the cooling time, the quality of the product, and temperature and pressure, etc.
The working procedure for the injection molding machine can be broken down into the following steps. Preparation of raw materials, plasticization, and injection, holding and cooling, opening of the mold, demolding, and cyclic process.
Raw material preparation
Plastic raw materials (such as plastic granules or powder) are first dried to remove moisture and impurities.
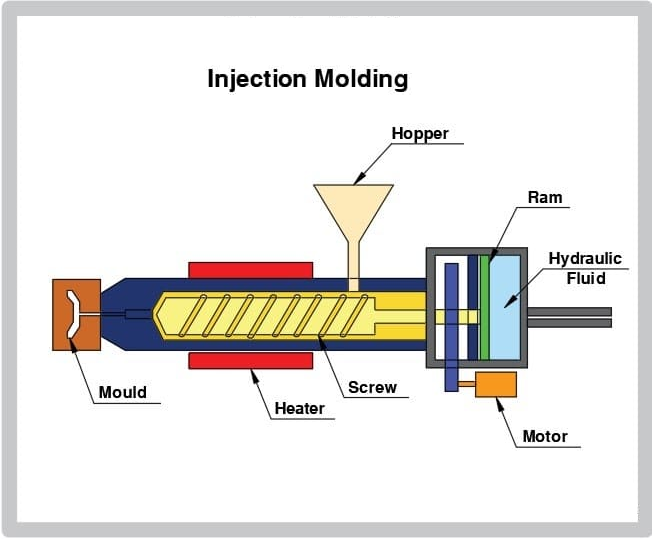
The dried raw materials enter the barrel of the injection molding machine through the hopper.
Raw Material Selection and Inspection
Select appropriate plastics (such as ABS, PP, and PC) based on product performance requirements (such as strength and heat resistance). Raw materials must undergo visual inspection and technical performance testing (such as flowability and shrinkage) to ensure they meet process requirements.
Pretreatment and Drying
- Drying and Dehumidification: Plastic pellets must be dehumidified in a dryer (e.g., using a dehumidified drying hopper) to prevent bubbles and degradation during injection molding. This process must be performed in a sealed environment using filtered, dehumidified air.
- Mixing and Additives:If flame retardants, masterbatches, etc. are required, they should be mixed with the main ingredients at this stage.Some raw materials may require shredding or pelletizing.
- Special Material Handling: Metal Injection Molding (MIM) requires mixing metal powder with a binder and pelletizing; thermoset plastics require separate preheating.
Equipment Preparation and Material Feeding
Clean the injection molding machine barrel to prevent contamination. The dried pellets are fed into the injection molding machine via a hopper.
The hopper design must ensure a constant feed rate and maintain plasticizing stability.
Preheating and Plasticizing Preparation
The raw material is gradually melted within the barrel through heating (usually by an electric heating band) and the shearing action of the screw.
Temperature Control
The barrel temperature is set according to the material’s melting point (e.g., approximately 200–250°C for ABS).
Screw Rotation
This uniformly plasticizes the pellets while conveying them into a melt.

Plasticization
The raw materials are heated and melted in the barrel through the rotation of the screw. And the action of the heating element to form a uniform molten plastic.
The rotation of the screw not only melts the plastic, but also further mixes the plastic through shearing action to ensure its uniformity.
Heating and Melting
- Dual heat sources: The barrel’s external heating belt provides conductive heat, while the screw’s rotation generates shear friction heat, which together heat and melt the plastic.
- Temperature control is crucial and directly affects the polymer’s viscosity and flowability.
The screw’s core function
- The screw’s rotation propels the material forward, continuously transforming it into a “conveying-compacting-mixing” process.
- The material is dispersed and mixed within the screw’s grooves by shear forces, gradually transforming from a loose solid into a uniform, viscous melt.
Melt Homogenization
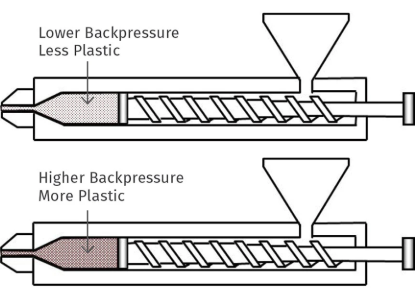
Through the screw’s shear mixing and barrel heating, the melt achieves uniform density, viscosity, and composition, forming a “continuously homogenized melt.” Back pressure control is required during this process to ensure a dense, bubble-free melt.
Material Storage and Pre-Plasticization
- After plasticization, the melt is temporarily stored in the reservoir at the front of the barrel.
- Under the set back pressure, the screw moves axially backward to the metering position, preparing a sufficient amount of melt for the injection phase.
- At this point, the screw stops rotating and the injection cylinder is depressurized.
Injection
When the plastic reaches the proper temperature and fluidity, the screw or hydraulic cylinder injects the molten plastic into the closed mold cavity at high pressure.
The injection process needs to ensure that the plastic completely fills the mold cavity to avoid defects such as bubbles or unfilled.
Melt Preparation
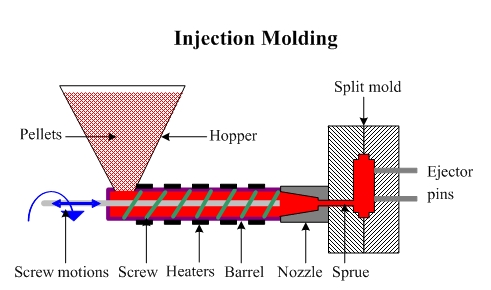
Plastic granules enter the barrel through the hopper. Sheared by the screw’s rotation and heated by the barrel, they melt and plasticize, forming a uniform melt that accumulates at the front end of the screw.
During this process, the screw rotates but does not move axially to ensure that the melt temperature and viscosity meet specified standards.
Key Control Points: Melt homogeneity, temperature stability, and plasticization accuracy directly impact injection quality.
High-Pressure Injection
- Mold Clamping and Locking: The mold is closed and locked under high pressure in the clamping unit, creating a sealed cavity for injection.
- Screw Advance: The screw stops rotating and advances axially at a set speed and pressure, injecting the melt through the nozzle into the mold cavity.
- Venting Design: During melt filling, venting slots are located at the end of the mold to vent air and prevent air entrapment.
Holding Compensation
Switch Holding: Immediately after the cavity is filled, the screw maintains forward pressure (holding pressure) to continuously replenish the shrinking melt and compensate for volume loss caused by cooling and shrinkage.
Pressure holding time: The pressure holding effect only lasts until the gate solidifies, after which the added material cannot enter the cavity.
Holding and Cooling
After injection, the mold remains closed and the plastic continues to cool and solidify in the mold cavity to form the desired shape.
During the cooling process, it may be necessary to apply some pressure holding pressure to prevent the plastic from shrinking.
Holding Pressure Phase
Purpose: Compensates for plastic shrinkage during cooling, prevents sink marks and internal voids, and ensures part dimensional accuracy and surface quality.
Operational Process
Starting Time: Immediately after the Filling phase, when the mold cavity is filled with molten plastic.
Pressure Application: The screw remains in the forward position (no longer rotating), and a specific pressure (holding pressure) is maintained by the hydraulic system to force additional melt into the cavity, offsetting the volumetric shrinkage of the plastic as it cools.
Key Control Parameters
- Holding Pressure: Must be lower than the Filling Pressure, otherwise flashing may occur.
The operator should gradually adjust the pressure to the optimal value to avoid overcompensation. - Holding Time: Depends on the properties of the plastic and the solidification time of the gate. Holding pressure is effective only when the gate has not solidified; once the gate solidifies, holding pressure ceases.
- Equipment Status: The screw is stationary, and the injection molding machine nozzle maintains contact with the mold sprue, ensuring continuous replenishment of melt.
Cooling Phase
Purpose: Allows the molten plastic to solidify and form within the mold cavity, stabilizing the part shape and shortening the production cycle.
Operational Process
Relationship with Holding Pressure: The cooling phase partially overlaps with the holding pressure phase. After holding pressure ends, cooling continues until the part is fully solidified.
Cooling Mechanism
- Mold Cooling Channels: Cooling channels (usually cold water) are embedded within the mold to remove heat from the melt through heat conduction, accelerating solidification.
- Natural Cooling: Some processes rely on natural heat dissipation, but this is less efficient.
Key Control Parameters
Cooling Time: This accounts for 60-80% of the entire injection molding cycle and is a key factor limiting production efficiency. The duration depends on part thickness, material thermal properties (e.g., PP cools slower than ABS), and mold design.
Cooling Temperature: The water temperature must be precisely controlled to avoid excessive cooling, which can cause internal stress or deformation.
Equipment Operation
Nozzle Retreat: During the final cooling phase, the injection molding machine nozzle retracts away from the mold main flow channel to prevent residual melt from solidifying and clogging the main flow channel.
Premolding: While cooling, the screw starts to rotate and performs the next cycle of plasticization (premolding) to prepare the melt for the next injection
Mold opening and demoulding
After cooling, the mold is opened and the finished product is taken out of the mold. Post-processing:The finished product may need further processing, such as cleaning, deburring or coating etc.
Cooling Phase
After injection, the molten plastic cools and solidifies within the closed mold. The mold can only be opened when the part has cooled sufficiently to retain its shape. Cooling time must be strictly controlled, otherwise deformation or dimensional deviation may occur.
Holding Pressure
During the initial cooling phase, the screw continuously applies holding pressure to compensate for plastic shrinkage and ensure product density and dimensional tolerances. Holding pressure must continue until the gate solidifies, otherwise the melt may flow back.
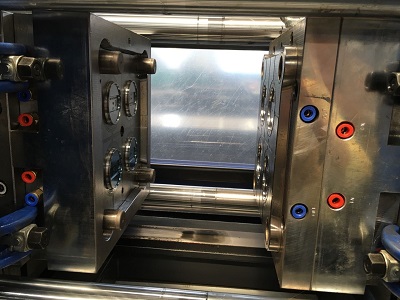
Mold Opening Operation Process
Mold opening command trigger: Cooling completes → System issues mold opening signal → Hydraulic oil pump starts
Mold opening operation
- Slow start: The movable platen moves back slowly to avoid sudden impact and mold damage.
- Accelerated mold opening: After a short distance, the mold opens rapidly to improve efficiency.
- Slow end: The mold opens slowly near the end point to ensure a smooth stop.
Safety confirmation
The mold chamber must be monitored for foreign matter throughout the mold opening process. Otherwise, the low-pressure protection system will stop to prevent mold compression. Before operation, close the safety door and confirm the travel switch signal.
Demolding (Ejection) Stage
Demolding Mechanism
After the mold is opened, the plastic part typically adheres to the movable mold side (the mold half with the ejector mechanism). Ejector pins, driven hydraulically, push the part out of the mold cavity.
Key Requirements
- Ejection must be smooth to avoid part deformation or surface damage.
- Ejection stroke and speed must be adjusted based on the product structure (e.g., deep-cavity parts require slow ejection).
Automated Assistance
Robots or pneumatic devices can automatically remove parts, shortening cycle times.
Cyclic process
Injection molding is a cyclic process, and each cycle includes the six steps mentioned above. After completing a cycle, the mold closes again and the next production cycle begins.
Through the above steps, the injection molding machine can efficiently produce high-quality plastic products. This process involves not only mechanical operations, but also requires a deep understanding and control of material properties and process parameters.
Clamping Phase
The two halves of the mold are closed and locked under high pressure by the clamping unit to ensure that the mold is not stretched open by the molten material during injection. The clamping time depends on the machine size and the clamping force.
At this time, the ejector pins are retracted, preparing for subsequent demolding.
Injection Phase
- Plasticizing & Dosing
- Pellets enter the barrel from the hopper and are melted and plasticized by the shear heat of the rotating screw and the external heating of the barrel. The screw rotates backward to produce the desired shot size (the dosing phase). This process can be performed simultaneously with the cooling phase of the previous cycle to improve efficiency.
- Filling
The screw acts as a piston, advancing, injecting molten plastic at high pressure and speed through the nozzle, runners, and gates into the closed mold cavity. - Packing/Holding
After the mold cavity is filled, a certain pressure is maintained to compensate for the material’s shrinkage during cooling and ensure part density.
Cooling Phase
The melt solidifies and sets within the mold cavity through cooling channels (usually circulating water). The temperature must drop to below the glass transition temperature or melting point.
The cooling time depends on the material properties, part thickness, and mold design.
Mold Opening & Ejection Phase
The mold opens, the movable mold side retreats, and the molded part is usually attached to the movable mold side. The ejector mechanism ejects the part, completing demolding.
After ejection, the mold closes again, and the cycle begins again.
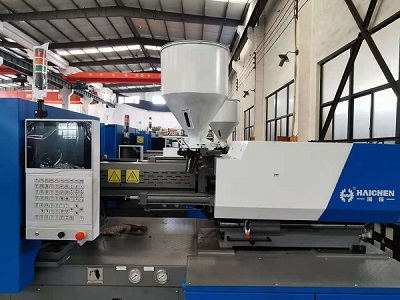
Haichen plastic injection molding machine
We are Haichen, one injection molding machines manufacturer over more than 10 years.
Our Haichen injection molding machine parts are used with famous international and Chinese domestic brands.
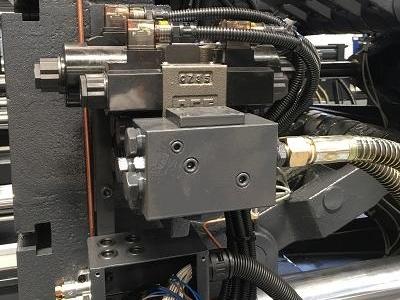
Like injection parts of injection moulding machine parts, we have stainless steel, two-metal screw and high mexing screw for selection. In clamping part of injection moulding machine parts, we use electronic position ruler with USA brand Bonny as standard. And Germany brand Novotechnik for option. In hydraulic part of injection moulding machine parts, we use Chinese famous brand Herg. And in electrical control parts of injection moulding machine parts, we use brand Schneider electric.
These can ensure our machine improves production efficiency and injection precision. Morover, all our servo energy saving injection molding machines quality under CE safety standards certificated.